 All Blog Posts
Statistics
Currently in L. Shelby'sWorldbuilding Database:
56 Stories (19 Finished)
461 Characters
1006 Events
654 Locations
214 Images

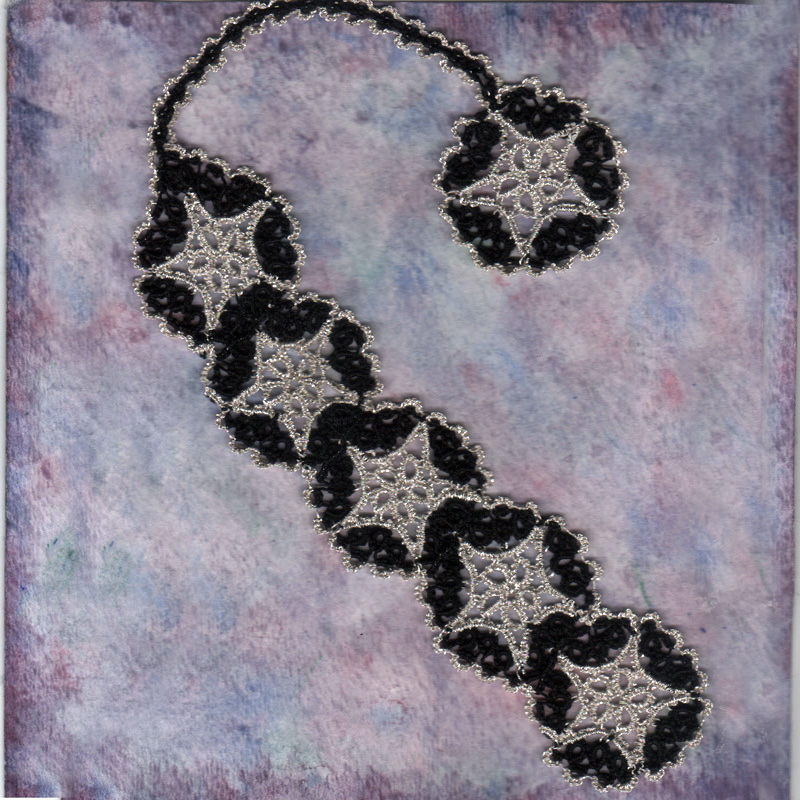
This page is exactly the same as the 5-Star Bookmark page, except that all the stitch number counts have been altered so that the pattern can be made with the thread used for the star being a smaller size than the contrasting thread. This is because when I first created this pattern, I created it using metallic silver thread for the stars which was noticeably thinner than the black size 20 thread I was using as a contrast color.
Start by tatting the star...
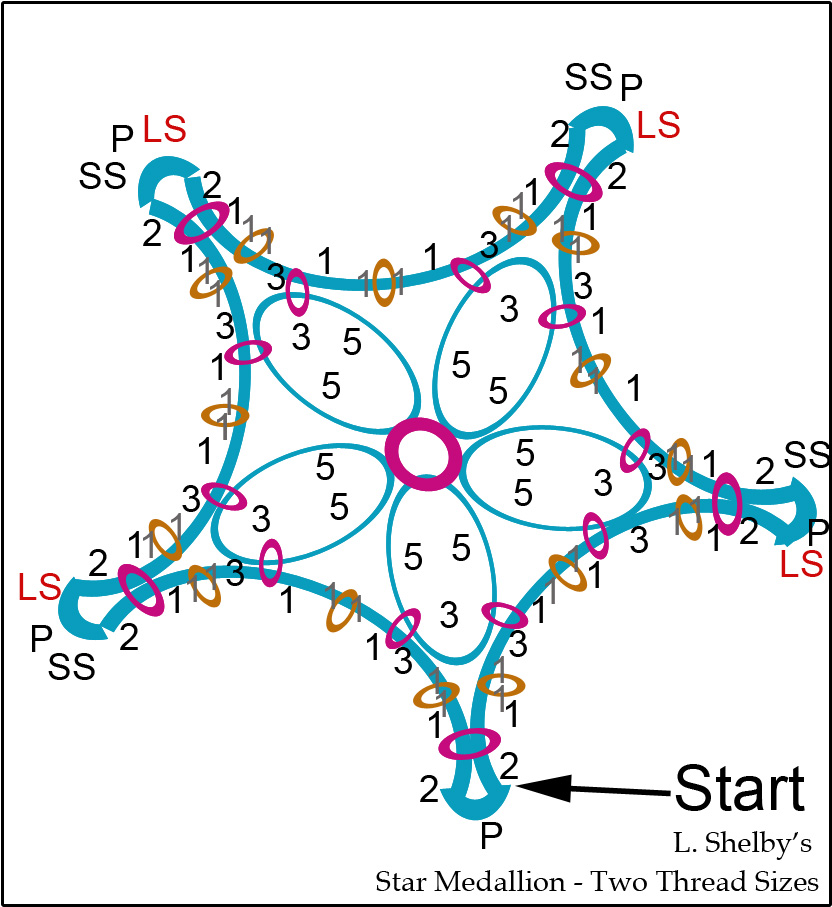
Start at a point of the star.
The second picot you make on the first ring, (marked with a +) will be the center picot right in the middle of the diagram. Make it a little bigger than the other picots, but not too huge.
LS ( lock stitch). On the shuttle, this is a stitch that is not flipped, so that it doesn't slide down the core thread. You tighten the thread up before making the lock stitch, (which is only half a stitch.) Then I leave a P (picot) in the middle of the half done stitch, and the SS here stands for the second half of a doublestitch, to hold the picot in place.
The important thing is that the core thread should be tightened and fastened, and that there's a picot loop at the top of the point, and you're ready to start back down the other side.
You now should have a curved section going from point to point on the star, with two of the 5 center rings attached to it.
Once you have repeated 3 times, you should have five center rings, three completed star points, and two half points. Now you're ready to join up the last two points and complete the star.
You are now ready to begin the border. The border uses four split rings along the outer edge between each point of the star, and three ordinary rings filling in the space inside. The split rings are made by starting out to make an ordinary ring (with the star color), and then instead of tightening and closing the ring, creating additional non-flipped stitches on the opposite side of the ring (with the contrasting color). Once both sets of stitches have been made, the ring can be tightened and closed. You will make one border section exactly like the ones in the Star Medallion pattern, and then you will make a joining border section (displayed further down).
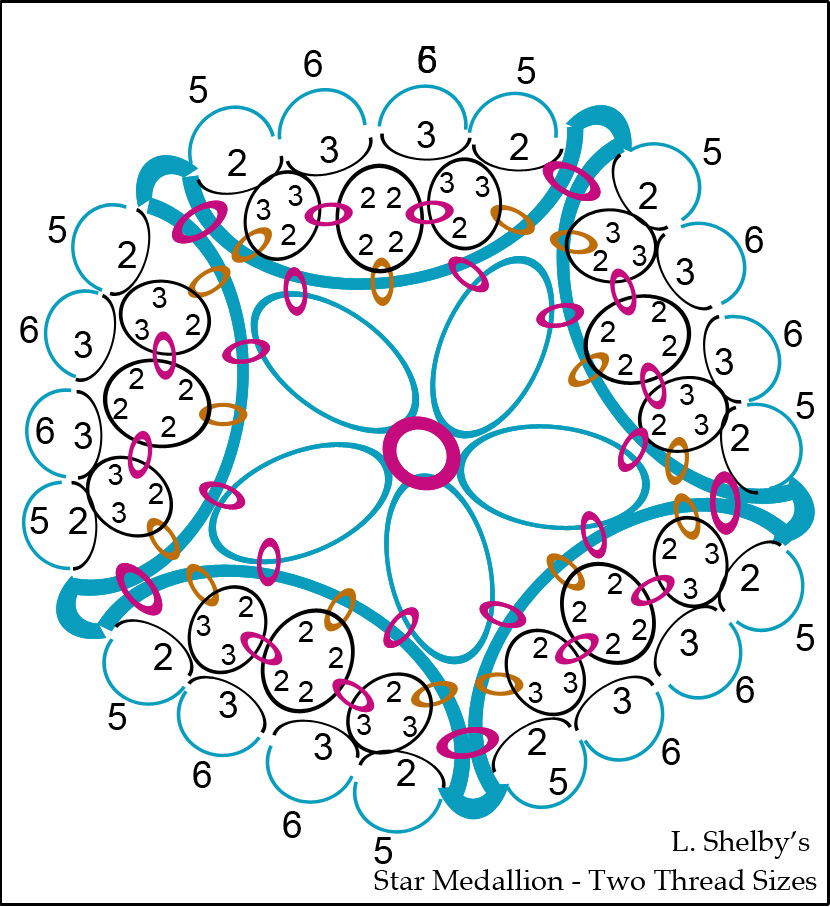
Now a joining border section.
The "Ring" shown as red, is actually a mock ring (or a self-closing mock ring, if you prefer.)
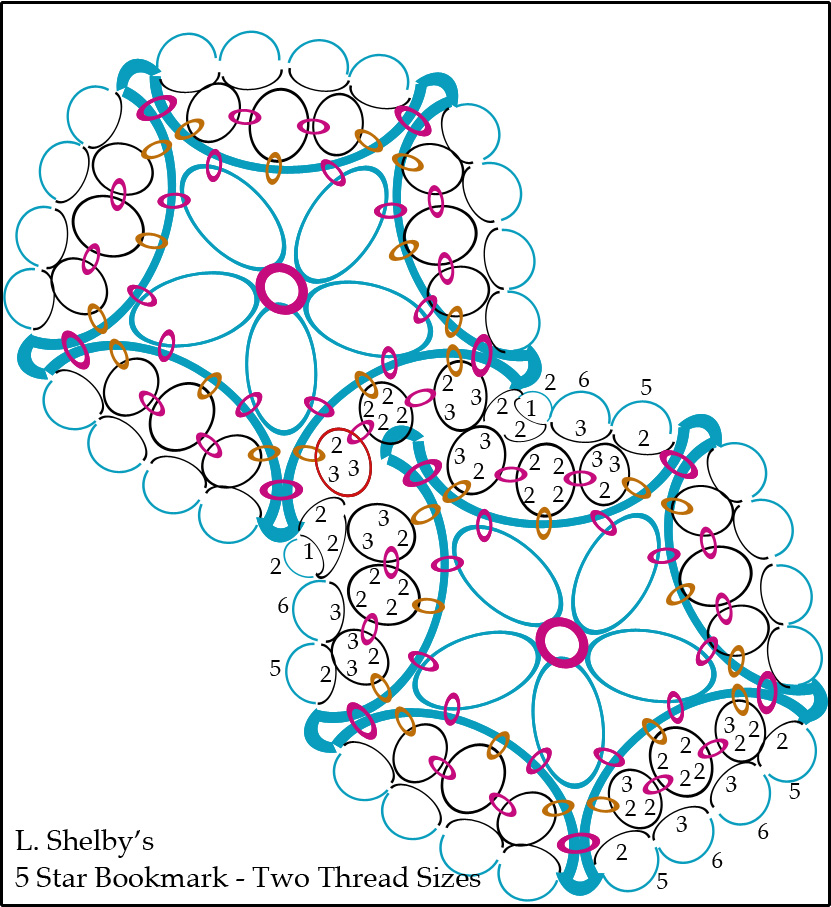
Now you tat your next star. This is mostly the same as tatting the first star, except that you must connect the star to the joining border as you tat the first half of the first point-to-point segment. To create joins that look similar to the reverse picots, do the first half of a double stitch twice, rotate your tatting away from you so that it flips over, do the join and the second half of a double stitch twice, and then rotate the tatting back to how it was.
Finish the remaining Point-to-Point star sections exactly the same as you did for the first star, and then tat an ordinary border section and a joining border section for that star. Repeat until you have four stars, and a border that goes along one edge of all of them.
Do the fifth star the same as stars 2-4, but after you tat your first border section, do not follow it up with a joining border section. Instead, for a bookmark without a dangle, just continue to do ordinary border sections three more times, so that your border goes all the way around the star, except for the half section between the fourth and fifth stars. Now it is time to do a Closing Border Section.
Closing border section:Now tat an ordinary border section, and continue to alternate between closing border sections and ordinary border sections until there is only one borderless section left on the first star. Close it up with an ordinary border section, and finish off your threads. You are done.

